Integrating Azure Notebooks (Jupyter Notebooks) with GitHub
Integrating Azure Notebooks (Jupyter Notebooks) with GitHub
오역 주의
원문: Integrating Azure Notebooks (Jupyter Notebooks) with GitHub
서론
Jupyter Notebook 은 다양한 유형의 분석 분야에서 사용할 수 있는 훌륭한 도구다. 최는 Jupyter Notebook 을 사용하여 관심있는 다양한 주제에 대한 연구를 시작했다. 그것은 나의 학습 효과를 높이는데 효과적이었다.
온라인 상에는 Jupyter Notebook 을 로컬 컴퓨팅 장치나 다양한 클라우드 호스팅 공급자에 설치하는 방법에 대한 자료가 많다. 하지만, 민감한 정보가있는 작업을 하지 않을 경우 Jupyter Notebook 을 설치하고 관리하는것은 필요로하는 것보다 많은 오버 헤드가 발생할 수 있다.
Microsoft 는 Jupyter Notebook 을 클라우드 호스팅 해주는 Azure Notebooks 서비스를 무료로 제공한다. Azure Notebooks 은 현재 적극적으로 개발 중이며 자주 업데이트 되고 있으며, 노트북 공유를 쉽게 해준다.
Microsoft Azure Notebooks - Online Jupyter Notebooks
나는 여전히 GitHub 를 사용하여 Azure Notbooks 외부에서 내 노트북을 보관하고 버전을 관리하는 것이 중요하다고 생각한다. 만약 내 노트북에 접근을 제한하려고 하거나 다른 Jupyter 설치 환경에서 사용하려고 한다면 GitHub 저장소를 통해 간단히 할 수 있다. Azure Notebooks 은 GitHub 와 쉽게 통합 가능하며 아래에서 통합 방법을 소개한다.
Azure Notebooks 와 GitHub 저장소 통합 방법
Step 1. Azure Notebooks Library 를 위한 새로운 GitHub 저장소 생성

Step 2. Azure Notebooks 에서 새로운 라이브러리 생성
Azure Notebooks 의 Libraries 화면에서, ‘Create New Library’ 버튼을 클릭 후 표시되는 창에서 ‘From GitHub’ 탭을 선택한다. 위 단계에서 생성한 GitHub 저장소 정보를 알맞게 채운 후 ‘Import’를 하면 약간의 시간이 흐른 뒤 라이브러리 생성 완료!

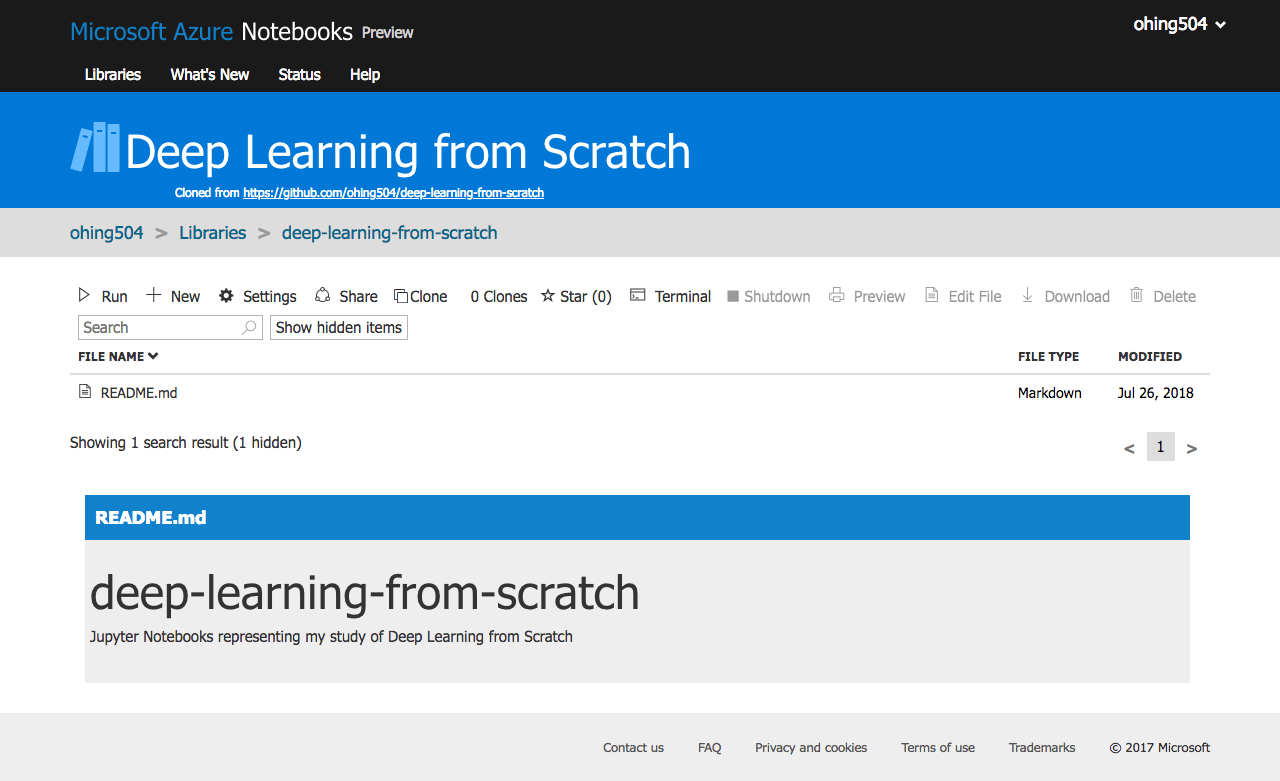
Step 3. 라이브러리 터미널에서 Git 명령어를 통해 GitHub 에 접속하기 위한 설정
Azure Notebooks 의 Import from GitHub 문서의 끝에 보면 다음과 같은 내용이 있다.
The GitHub repo will be cloned into your library including all of the notebooks and other files. The Git history will also be preserved. You can then use standard Git commands from the Terminal window to commit changes, pull changes from GitHub, etc…
Azure Notebooks 은 우리의 GitHub 저장소를 복제(clone)하여 새로운 라이브러리를 만든다. 새로운 노트를 추가하고 변경하면 원격 GitHub 저장소에 변경 사항을 커밋(commit) 하고 푸시(push) 할 수 있기를 원하겠지만 현재 Azure Notebooks 에서는 이러한 기능을 자동으로 지원해 주지 않는다. 하지만 위에서 인용에서 얘기하는 것처럼 터미널에서 모든 Git 명령을 수동으로 실행할 수 있다.
노트북 서버의 터미널에서 복제 된 저장소에 대해 Git 구성 설정을 할 수 있다. Git 전역 설정은 노트북 서버 세션에서 유지되지 않으므로 사용자가 설정 한 모든 Git 구성 설정은 로컬 저장소 레벨에서 해야한다.
우선 Azure Notebooks 의 라이브러리에서 터미널을 실행한다.

터미널에서 현재 위치를 ~/library 폴더로 이동한다.
$ cd ~/library
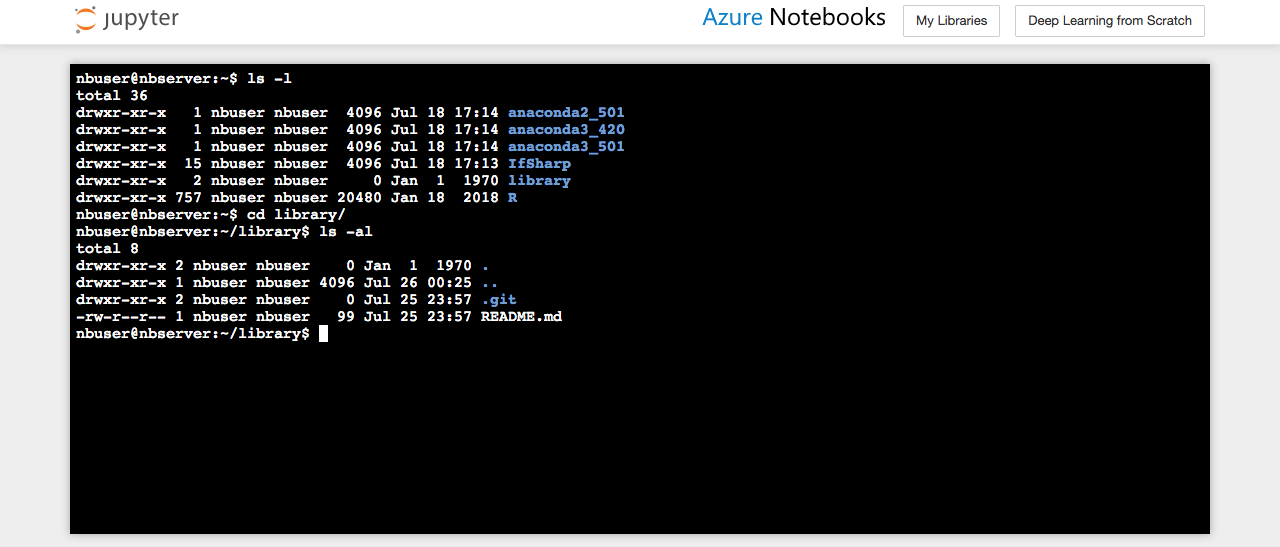
원격 GitHub 저장소에 접근하기 위해 로컬 Git 구성을 설정한다.
$ git config user.name "Your Name"
$ git config user.email "Your Email"
git config -l 명령을 사용하면 다음과 같이 설정된 값들을 확인할 수 있다:
$ git config -l
core.repositoryformatversion=0
core.filemode=true
core.bare=false
core.logallrefupdates=true
remote.origin.url=https://github.com/ohing504/deep-learning-from-scratch
remote.origin.fetch=+refs/heads/*:refs/remotes/origin/*
branch.master.remote=origin
branch.master.merge=refs/heads/master
user.name=Your Name
user.email=Your Email
Optional! 편의를 위해 git config push.default simple 설정을 통해 push.default 경고 메시지가 출력되지 않도록 할 수 있다:
# Before config push.default
$ git push
warning: push.default is unset; its implicit value has changed in
Git 2.0 from 'matching' to 'simple'. To squelch this message
and maintain the traditional behavior, use:

    git config --global push.default matching

To squelch this message and adopt the new behavior now, use:

    git config --global push.default simple

When push.default is set to 'matching', git will push local branches
to the remote branches that already exist with the same name.

Since Git 2.0, Git defaults to the more conservative 'simple'
behavior, which only pushes the current branch to the corresponding
remote branch that 'git pull' uses to update the current branch.

See 'git help config' and search for 'push.default' for further information.
(the 'simple' mode was introduced in Git 1.7.11. Use the similar mode
'current' instead of 'simple' if you sometimes use older versions of Git)

Username for 'https://github.com': ^C
# After 'git config push.default simple'
$ git push
Username for 'https://github.com': ^C
Step 4. 원격 GitHub 저장소에 대한 접속 테스트
원격 GitHub 저장소에 접속이 정상적으로 되는지 테스트하기 위해 라이브러리에 새로운 노트를 추가한다.
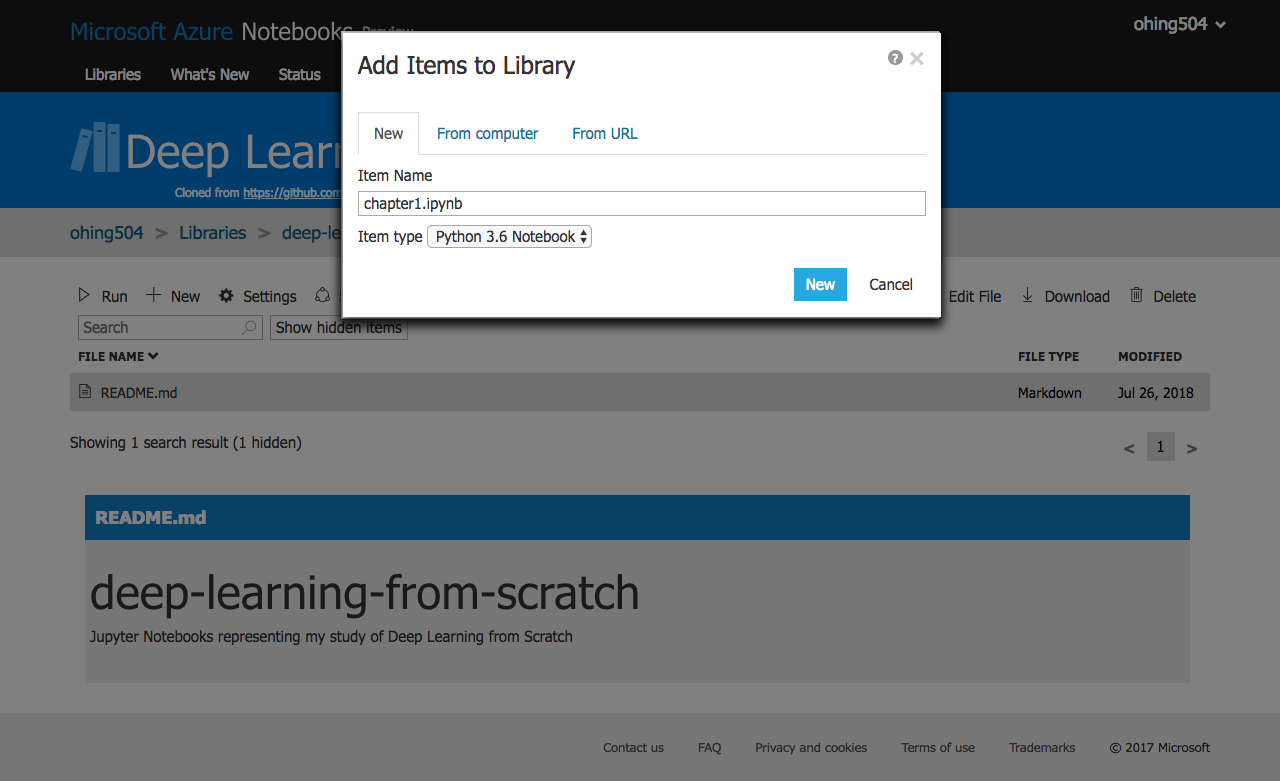
노트북 서버의 터미널에서 새로 생성한 노트를 Git 에 추가하고 커밋, 푸시한다:
$ cd ~/library
$ git commit -m "Adding the notebook for my study of chapter 1."
$ git push
Username for 'https://github.com': GitHub username 입력
Password for 'https://username@github.com': GitHub 비밀번호 입력
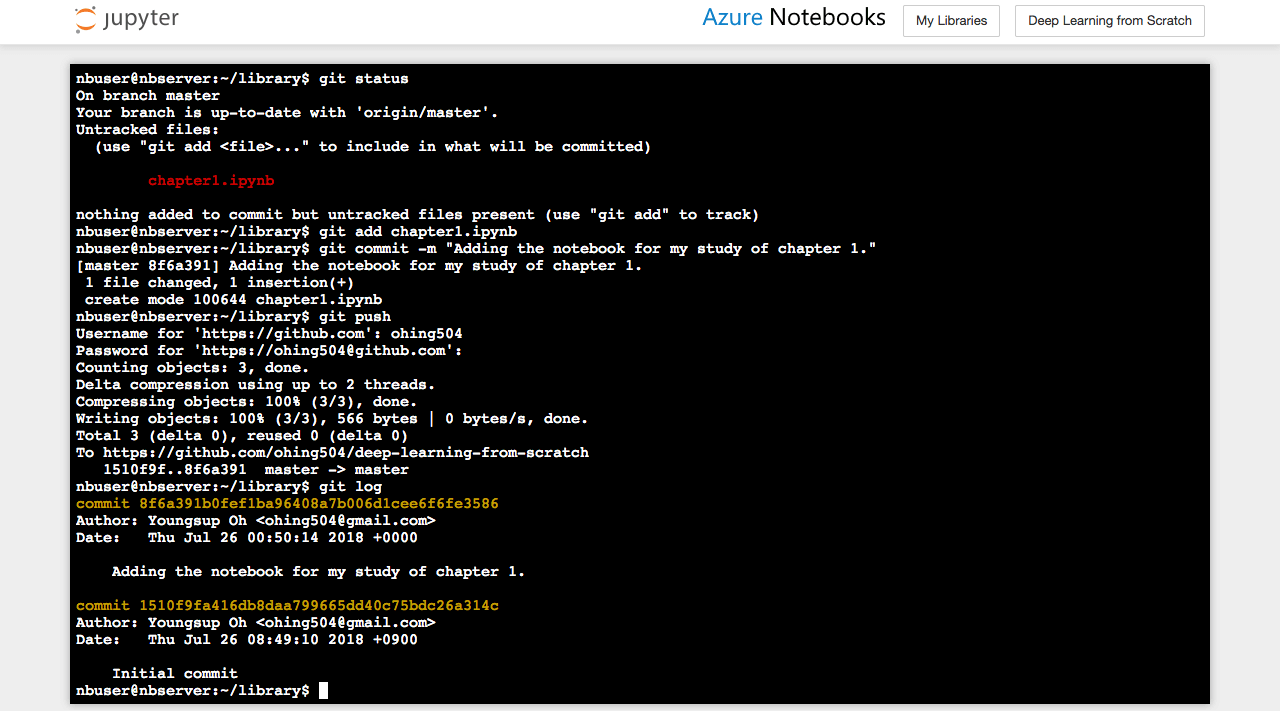
GitHub 저장소에 정상적으로 추가되었는지 확인한다:
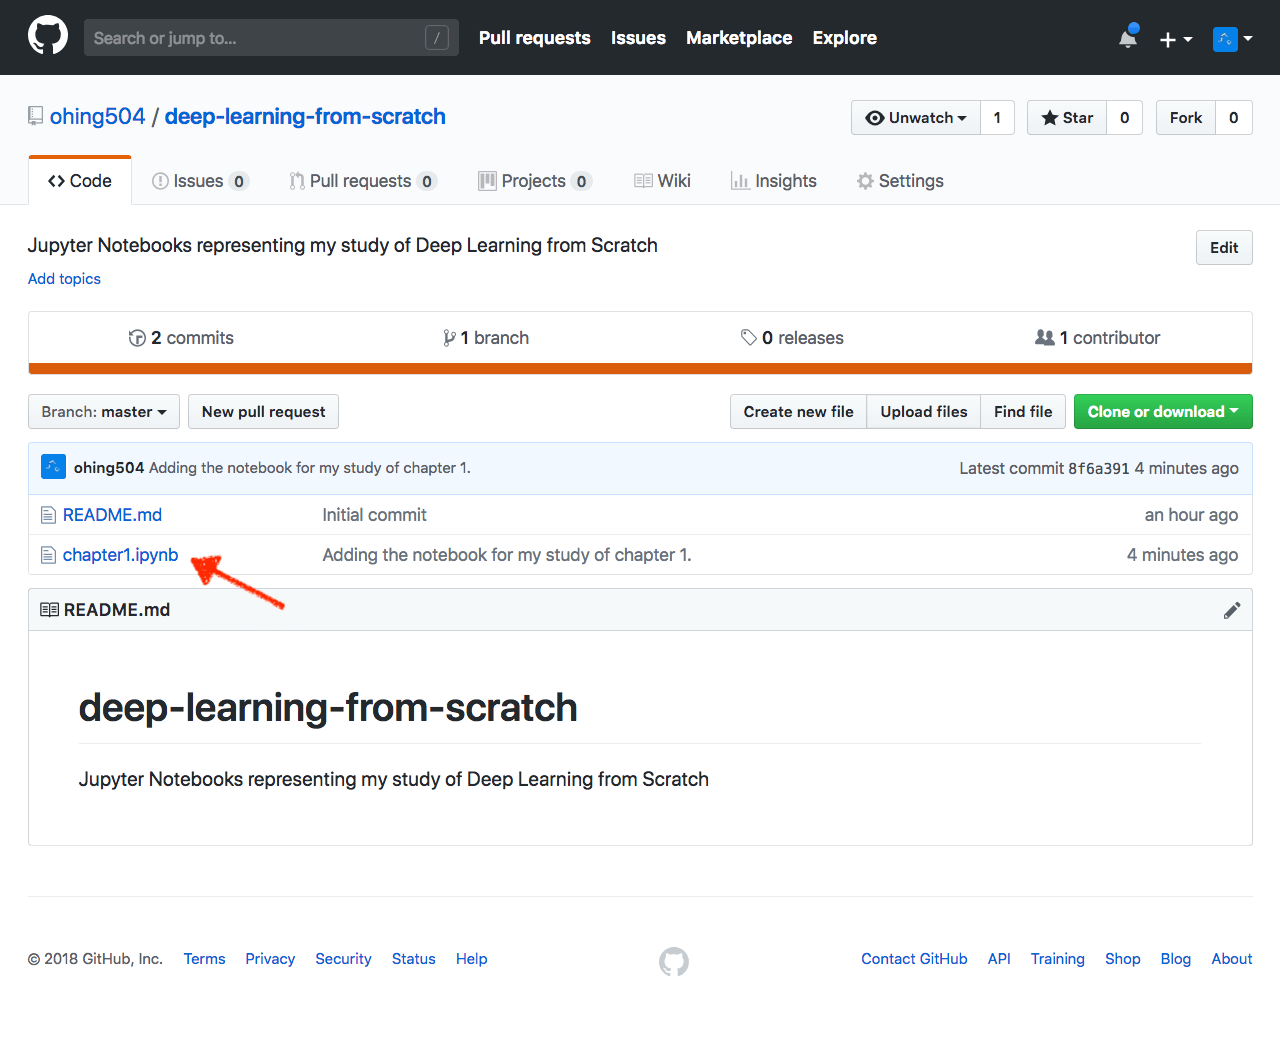
GitHub 와 Azure Notebooks 연동이 완료되었다. 이 방법은 Jupyter Notebooks 이 포함된 기존의 GitHub 저장소에 대해서도 동작한다. 내가 읽은 바로는, Azure Notebooks 은 앞으로 GitHub 와 더 많은 상호 작용을 자동화 할 것으로 보인다.